-
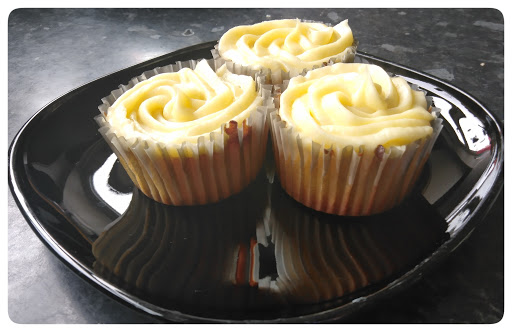
Lemon Cupcakes
These sweet treats are a lemon and yogurt cake with lemon buttercream. Unfortunately they are not vegan, and can’t be converted to vegan because you have to beat the egg whites. This recipe is based on Mary Berry’s Lemon and Yogurt Cake. I love these cupcakes because they remind me of Easter!
Servings: 15
Freezer Friendly?: Yes
Does It Keep?: 4-5 days in an airtight tin
Ingredients:
For the Cake:
- 300g Caster Sugar
- 50g Softened Butter
- 3 Large Eggs Separated
- 225g Greek Yogurt
- Zest of 1 Lemon
- 175g Self-Raising Flour
For the Buttercream:
- 600g Sifted Icing Sugar
- 275g Softened Butter
- Juice of 1 Lemon
Method:
- Preheat the oven to 160ºC (320 degrees Fahrenheit). Prep 15 cupcake slots with cupcake cases.
2. Beat together the sugar, butter and egg yolks in a bowl, using an electric mixture. Add the yogurt and lemon zest and beat until smooth. Put the rest of the lemon to the side for later. Gently fold in the flour.
3. In another bowl, whisk the egg whites until the form peaks and carefully fold into the mixture. Put a scoop of the batter in each cupcake case, making sure they are all even.
4. Bake for 10 minutes, or until a skewer comes out clean. Once out of the oven leave to cool for 30 minutes.
5. To make the buttercream, put the icing sugar and butter in a bowl. Juice the lemon that was leftover, and add it in the bowl. Mix using an electric mixer, until nice and smooth. If it is not lemon-y enough, add more lemon juice.
6. Once you are satisfied with buttercream and your cakes have cooled, pipe the icing onto the cupcakes. Once that is done, they are ready to enjoy!
Made this Recipe?
Leave me a message in the comments to tell me how it went!
You May Also Like
Vegan Biscoff Cheesecake!
-
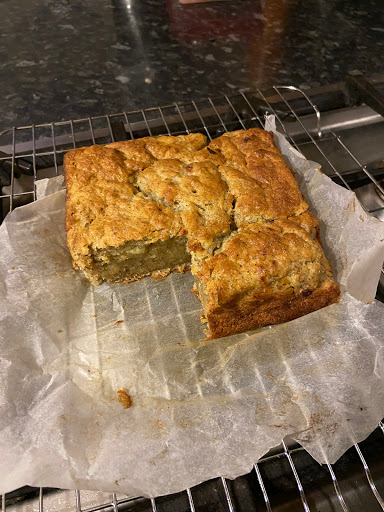
Vegan Banana Cake
This moist banana cake is delicious warm with custard, but also cold! It uses up over-ripe bananas that are not edible anymore! If you want it extra banana-ry add in two bananas!
Servings: 8
Freezer Friendly?: Yes
Does It Keep?: 2-3 days in an airtight tin
Ingredients:
- 1 Over-Ripe Bananas
- 87g Caster Sugar
- 87g Self-Raising Flour
- 87g Dairy-free spread
- A few drops of Vanilla Essence
- 3tbsp Chia Seeds
- 9tbsp Water
Method:
- Preheat the oven to 160°C (320 degrees F) and line a loaf tin with greaseproof paper.
2. Put the Chia Seeds and Water int a bowl and stir until the mixture thickens. Its ready when at an egg-like consistency.
3. Put all of the ingredients into a bowl and blend using an electric mixer.
4. Pour into the tin and bake for an hour.
Made this Recipe?
Leave me a message in the comments to tell me how it went!
-
Vegan Apple and Berry Crumble
Hi everyone, sorry this weeks recipe is a little late! This winter treat is perfect for a cold night and goes well with custard or ice cream. This bake marks the end of my Christmas Collection! This recipe is a different way to make crumble to how people usually do it, but i hope you like it!
Servings: 6-8
Freezer Friendly?: Yes
Does It Keep?: 2-3 days in an airtight tin
Ingredients:
- 100g Frozen Berries (type optional – I used mixed)
- 5 apples (type is optional)
- 50g Caster Sugar
- 175g Dairy-free spread
- 175g Plain Flour
- 150g Soft Light-Brown Sugar
- 25g Rolled Oats
Method:
- Preheat the oven to 160°C (320 degrees F) and grease an ovenproof dish with some dairy-free butter.
2. Cut the apples into thin slices and lay flat in the prepared dish and sprinkle over the caster sugar and bake until juicy and starting to caramelise. Then take out of the oven and put to the side.
3. To make the top, rub the butter and flour together in a bowl. Keep rubbing until it forms a crumbly dough texture. If it isn’t forming, add more flour.
4. Once it is ready, add in the oats and demerara sugar.
5. Spread the topping on a tray and bake for 15 or until golden. When out of the oven leave to the side to cool.
6. When ready to serve, turn the oven up to 180°C (356 degrees F).Spread out the frozen berries on top of the apples and crumble the topping on top too and bake well for 10 minutes.
Made this Recipe?
Leave me a message in the comments to tell me how it went!
-
Vegan Chocolate Orange Cake!
This loaf cake is filled with the bursting flavour of orange, and it is complimented with a rich chocolate! This is the last recipe that will be released in December, as I will be celebrating with my family.
Servings: 14
Freezer Friendly?: Yes
Does It Keep?: 2-3 days in an airtight tin
Ingredients:
- 140ml Soy Milk
- 1 Zested Orange
- Juice of an Orange
- 75g Dairy-Free Margarine
- 3tbsp Golden Syrup
- 1tsp Instant Coffee Granules
- 137g Self-Raising Flour
- 87g Caster Sugar
- 2tbsp Cocoa Powder
- 1tsp Bicarbonate of Soda
Method:
- Preheat the oven to 160°C (320 degrees F) and line a loaf tin with baking parchment.
2. Zest the orange into a small bowl and then juice. Add the juice to the bowl, and then add the milk and stir. Put to the side.
3. Put the margarine, golden syrup and coffee granules in a pan over medium heat. Once the margarine has melted take off the heat and leave to cool.
4. Sift the flour, sugar, cocoa powder and bicarbonate of soda into a large bowl. Next add the margarine mixture and the milk mixture into the large bowl and stir.
5. Once the batter is smooth, pour it into the tin and bake for 40-50 minutes.
Made this Recipe?
Leave me a message in the comments to tell me how it went!
-
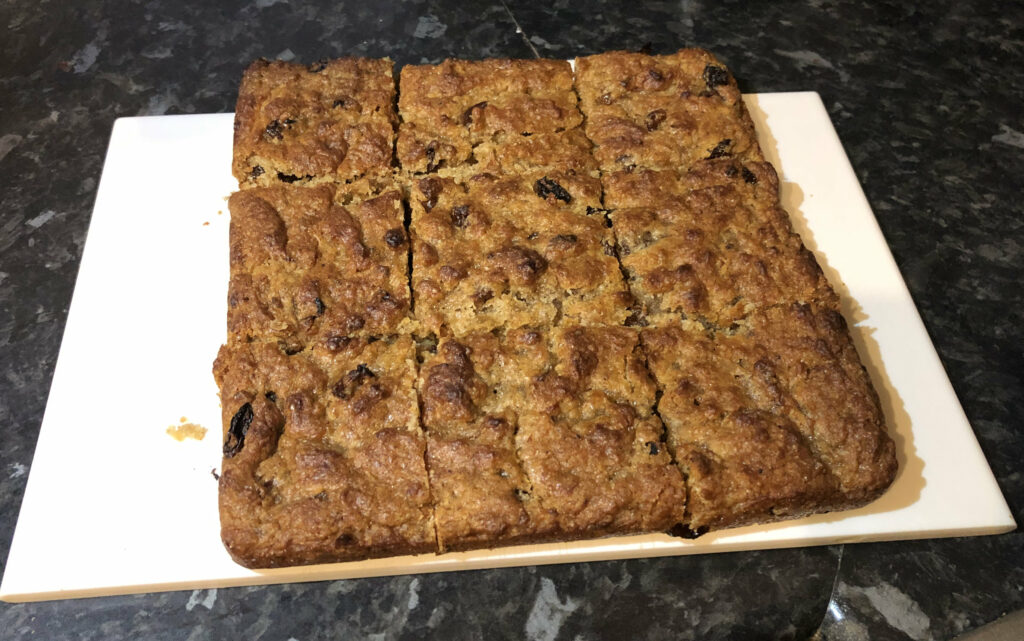
Vegan Mincemeat Blondies
Hi everyone! Sorry this week’s recipe is a little late, I had a very busy weekend! These festive delights are a vegan twist on one of our family favourites! These blondies are truly more-ish, with the fruity spices from the mincemeat and the zesty orange flavour. Don’t over-bake these to ensure that gooey, soft texture in the centre.
Servings: 9
Freezer Friendly?: Yes
Does It Keep?: 4-5 days in an airtight tin
Ingredients:
- 1 1/2tbsp Ground Chia Seeds
- 4 1/2tbsp Water
- 125g Dairy-Free Block/ Butter
- 210g Demerara Sugar
- 3/4 tbsp Vanilla Extract
- 165g Plain Flour
- 3/4 tsp Baking Powder
- 1/2 tsp Fine Sea Salt
- 1tbsp Mixed Spice
- 1/2 tsp Ground Cinnamon
- Zest of 1 Orange
- Juice of 1/2 an Orange
- 200g Vegan Mincemeat
Method:
- Place the butter in a saucepan over medium heat until it has all melted and is bubbling. It should turn a deep amber colour.
2. Pour it all into a large bowl to cool. Whilst waiting for it to cool, line a 22x28cm baking tin with baking paper. Heat the oven to 190°C ( 374 degrees f).
3. Zest the orange and put it into a small container for a while. Make the egg substitute by putting the chia seeds in the water for a few minutes and stir it. Keep stirring until it has an egg – like consistency.
4. Measure the sugar into the butter mixture and combine. Then add in the chia seeds and mix again. Stir in the vanilla essence.
5. Tip in the flour, baking powder, salt, spices, orange zest and the orange juice. Begin to fold. Finally, stir in your vegan mincemeat.
6. Transfer the blondie batter into the tin and make it even. Bake for 20-25 minutes, or when a skewer comes out clean. It should be a golden brown colour.
Made this Recipe?
Leave me a message in the comments to tell me how it went!
-
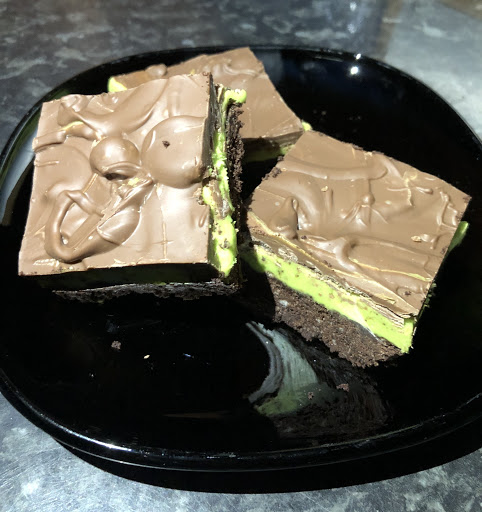
Grandma’s Peppermint Squares!
Delicious Peppermint Squares! These can easily be made vegan by replacing the butter with dairy-free spread, and changing the chocolate to dark chocolate (that doesn’t have cocoa butter in). This recipe is fairly similar to my Millionaire’s Shortbread recipe which you can find here: https://www.thehalfvegan.com/2020/11/14/yummy-millionaires-shortbread/
Servings: 12
Freezer Friendly?: Yes
Does It Keep?: 2-3 days in an airtight tin
Ingredients:
For the Base:
- 85g Plain Flour
- 50g Caster Sugar
- 120g Butter
- 50g Cocoa Powder
For the Peppermint Layer:
- 1tsp Peppermint Extract
- 2-3 drops Green Food Colouring (liquid)
- 150g Icing Sugar
- 75g Butter
For the Top:
- 225g Milk Chocolate
Method:
- Line a 7inch tin with baking paper and set the oven to 180°C (356 degrees F).
2. To make the base, cream the butter, cocoa powder and sugar in a bowl with an electric mixer. Add in the flour after and mix again. It should have a crumby dough consistency.
3. Pour the dough the tin. Firmly press it down into the bottom of the tin. Bake for 25 minutes or until a skewer comes out clean. Put to the side to cool.
4. Next, measure the butter – for the peppermint layer- in a bowl and then cream with an electric mixer. Then add in the icing sugar and mix again. Add in the food colouring and the peppermint extract. Mix it all together. It takes a little while to get the right texture but it will eventually be a creamed butter texture. Put to the side until the base has fully cooled.
5. When the base has cooled spread the peppermint layer evenly on top of the base, and leave to set for 30-45 minutes.
6. Once set, melt the chocolate and leave to cool until the chocolate is runny and moderately cold. Then spread it over the rest of the slice and leave in the fridge until the chocolate is hard.
Made this Recipe?
Leave me a message in the comments to tell me how it went!
-
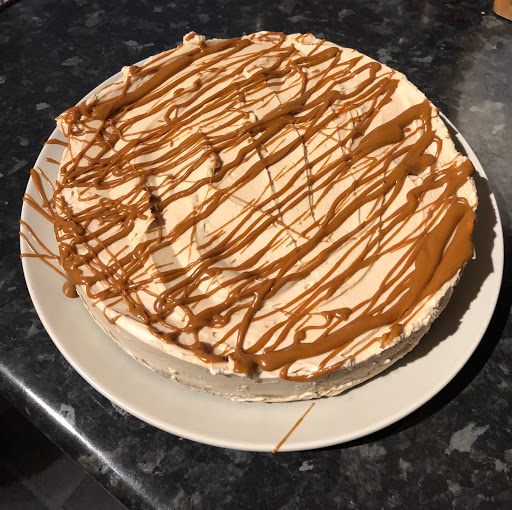
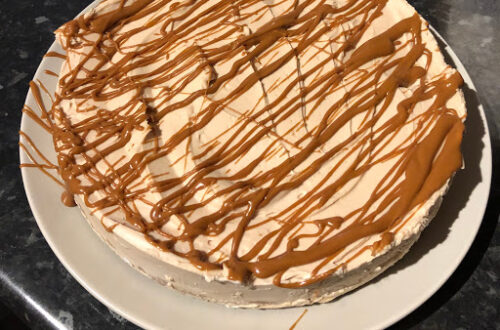
Vegan Biscoff Cheesecake!
A tasty treat for all the family! My Vegan Biscoff Cheesecake has a delicious crumby base, yet a creamy top! I chose to decorate mine with 25g of melted biscoff spread, that I drizzled with a spoon. This was specially requested as a recipe from a family member of mine, and it came out better than I thought!
Servings: 8 slices
Freezer Friendly?: No
Does it Keep?: for 2-3 days if in fridge
Ingredients:
For the Base:
- 200g Biscoff Biscuits
- 80g Melted Vegan Butter/Spread
For the Cheese Filling:
- 700g Vegan Cream Cheese
- 150g Biscoff Spread
- 50g Caster Sugar
Method:
- To make the base, crush the biscuits in a sealed bag, using a rolling pin. Then combine with the melted dairy-free spread. Press the mixture into the bottom of an 8″ Round Spring Form Tin and put in the fridge for 20 minutes.
2. For the topping, measure out all the cream cheese, sugar and biscoff spread into a large bowl. Beat them together with an electric whisk and spread the mixture over the base.
3. Put in the fridge for at least 1 hour, so that the topping sets. If it’s not setting quick enough, put it in the freezer for a little while.
Made This Recipe?
Leave me a message in the comments to tell me how it went!
You May Also Like

Lemon Cupcakes
-
Yummy Millionaires Shortbread!
Yummy Millionaires Shortbread! It has a crumbly shortbread, sweet caramel and topped with some delicious chocolate! It doesn’t have to be made with dark chocolate and milk chocolate, but any chocolate you like! If you want a marbled chocolate look, use white chocolate and milk chocolate and swirl with a skewer. PLEASE NOTE: This is not Vegan.
Servings: 8
Freezer Friendly?: No
Does It Keep?: In an airtight container for about a week
Ingredients:
For Shortbread:
- 100g Unsalted Butter
- 50g Caster Sugar
- 137g Plain Flour
For Caramel:
- 100g Unsalted butter
- 1.5 tbsp Caster Sugar
- 2 tbsp Golden Syrup
- 198g Condensed Milk (half a tin)
Chocolate:
- 100g Milk Chocolate
- 50g Dark Chocolate
Method:
- Set the oven to 180ºC (356 degrees F). Line a 7×7 inch tin with baking parchment.
2. To make the shortbread, cream the butter and sugar in a bowl with an electric mixer. Add in the flour after and mix again. It should have a crumby dough consistency.
3. Pour the dough the tin. Firmly press it down into the bottom of the tin. Bake for 20 minutes or until golden brown on the top.
4. When fully baked, leave to the side to cool. Put the sugar, butter, golden syrup and condensed milk into a large saucepan and cook on a medium heat until the butter has melted and sugar dissolved. Then leave to boil for 5-7 minutes constantly. BE CAREFUL not to touch the mixture as it is VERY HOT. The caramel will be ready when it thickens to a fudge like texture and is a slightly dark golden colour.
5. Pour the caramel into the tin, on top of the shortbread base, and leave to set in the fridge for an hour.
6. Once set, melt the chocolate and pour on top of the caramel and put back in the fridge for 1.5 – 2 hours or until the chocolate is hard. When done chop into pieces, and then it is ready to eat!
Made This Recipe?
Leave me a message in the comments to tell me how it went!
-
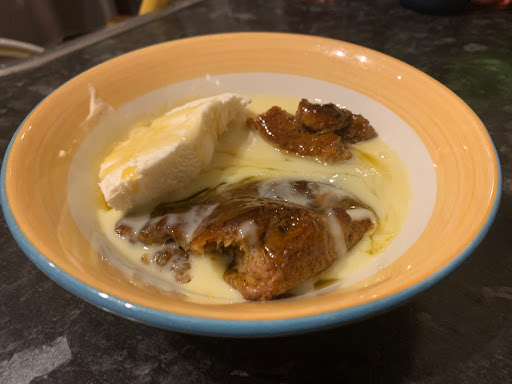
Vegan Sticky Toffee Pudding
A delicious treat for after a great meal! Goes well with Custard, Ice-cream or both!
Servings: 6
Freezer Friendly?: Only the Pudding
Does It Keep?: For 2-3 days if in fridge
Ingredients:
For the Pudding:
- 100g Dairy-Free Margarine
- 100g Demerara Sugar
- 200g Pitted Dates
- 200g Self-raising Flour
- 1tbsp Vanilla Essence
- 200ml Almond Milk
- 1tsp Baking Soda
For the Sauce:
- 200g Dairy-Free Margarine
- 400g Demerara Sugar
- 100ml Almond Milk
- 1tsp Vanilla Essence
Method:
- Preheat the oven to 180°C (356 degrees F).
2. For the pudding, in a large bowl combine the Margarine and Sugar. Chop the dates as finely as possible and add to a pan with the milk and vanilla essence.
3. Simmer for 5 minutes, then use a fork, spoon or potato masher to crush the dates so that they become soft. Leave to simmer for another 3-5 minutes.
4. Add the pan mixture to the margarine mixture and stir. Then add the flour and baking soda and stir again. You want the consistency like a soft peanut butter.
5. Line a backing dish (around 28 x 22) with a little margarine and some baking paper. Pour in the mixture and spread out evenly. Bake for around 30 minutes.
6.To check if the pudding is baked all the way through, put a toothpick through the middle; if it comes out clean its done. Leave to cool.
7.To make the sauce, add all of the ingredients to a pan. Heat on med-high heat, or until the butter has melted and the sugar dissolved. Bring to a gentle simmer and leave it for 3-5 minutes.
8. Make holes randomly on the pudding with a toothpick to help the sauce soak in. Pour half of the sauce over the pudding, spreading it evenly. Serve in a bowl/ plate and put in the microwave for 1-2 minutes. Pour over a bit of extra sauce on each one.
9. Its ready to eat! We had ours with Vegan Custard and Vegan Ice-cream.
Made This Recipe?
Leave me a message in the comments to tell me how it went!
-
Vegan Chocolate Mug Cake
A quick chocolate snack, perfect for any cold day! It has a brownie-like taste, yet a cake texture. I made 3 – One for me, one for my vegan and one for another non- vegan. We all loved it, vegan or not, and it doesn’t taste like its vegan at all! The great part is, it doesn’t take any extra bowls or cutlery, as you make it in a mug, and use a fork to whisk and eat it.
Servings: 1 mug
Freezer Friendly?: No
Does it Keep?: Only Edible When Fresh
Ingredients:
- 2 tbsp Vegetable Oil
- 2 tbsp Water
- 2-3 drops Vanilla Extract
- 1 pinch Salt
- 4 tbsp Caster Sugar
- 2 tbsp Cocoa Powder
- 4 tbsp Self-Raising Flour
Method:
- In a mug, add the water, oil and vanilla extract. Whisk well.
2. Add in the cocoa powder, whisk with a fork, then add the sugar and flour and whisk again. The batter should be the same thickness as cupcake batter.
3. Put in the microwave for 60-90 seconds, or until the centre is molten but the top looks like a sponge. Be careful not to overcook.
4. It is ready to be consumed as soon as out of the microwave, but may need to cool down. Please note this is meant to be consumed warm.
Made This Recipe?
Leave me a message in the comments to tell me how it went!